Import OLM files into Office 365
Among all MS Office applications, Outlook is one of the most commonly used email clients, especially in a professional environment. It is available for both Windows and Mac operating systems; the only difference is supported file format for data storage. On Windows Outlook create the PST file where Mac machines use Outlook 2011, which create OLM file format for data storage.
The trend to switch from desktop-based apps to online applications is on top. Nowadays, people do not only use cloud as a backup but also use the online apps that provide cloud based interface to work and storage. This time Microsoft has launched Office 365, which is a web-based application and provide multiple software on its subscription. This app provides the complete usage of MS office applications available for Windows and Mac users.
In case you are a Mac user, switching to Windows and wanted to save your OLM file in Office 365 without using Mac system, then you need to convert your OLM file into PST format first, as MS Outlook for Windows does not support .olm data files. After the successful conversion, then you can import your converted PST file into office 365.
Often Outlook users need to convert their data files into an OLM file to PST format or Office 365 to run them on Windows-based PC. There are methods available that you can use to export OLM file to PST format and then to office 365 (Outlook Web App).
Conversion from OLM to PST:
In order to import OLM into office 365 in Windows, first, you need to import your OLM files into Windows Outlook. To perform this process, first you need to setup an IMAP mail account, then you can use it to transfer Mac Outlook emails (OLM file data) to Windows Outlook (PST).
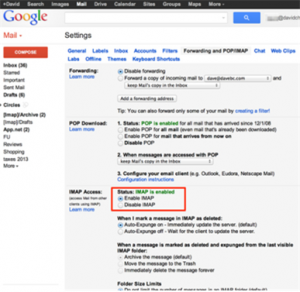
You can simply use your Gmail account to setup an IMAP account,
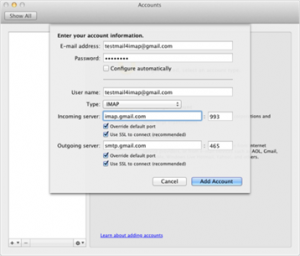
Now, configure OLM file with the Gmail account.
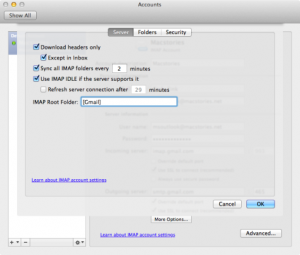
Create a Gmail label, and start synchronizing the OLM file with the IMAP account.
Move all the data from OLM file to IMAP mailbox.
Now, you can move those emails from IMAP mailbox to MS Outlook.
Now, enjoy your complete OLM file emails in MS Outlook
Steps to import PST file to office 365
You can do it by running the Microsoft PST Capture Tool. It tool helps you to capture PST file to migrate stored data. To do this you just need to create a PST search to locate the required PST files on a specific on your network and then you can easily import multiple PST files to specific mailboxes in your organization.
1. Properly install the PST Capture Tool in your system
Note I: To install the PST Capture tool you need to add the service account to the Local Administrators group on the server you are installing on.
Note II: You also need to manually install the PST Capture Agent on all machines, which you want to scan for PSTs. Therefore, install PST Capture Agent on your machine where your PST file is stored, to complete the process.
- After a successful download, again launch the tool
- On the main screen, you will be able to see two options ‘New PST search‘ and ‘New import list’
- Select the ‘New PST Search’ and choose one client computer in your domain
- In the next screen, you will be able to see the default options choose accordingly
- The next window will offer you to run manually or schedule the scan, choose one and click next and then finish
- Now go back to the PST Capture Tool Console, and check your machine name and selected the Search All Now Button
- After successful scan, select the server and the PST file, which was found and click on the New Import List and select Cloud Import and went to the new tab created ‘Cloud Import List’
- Now fill the credentials of your Office 365 account to establish an cloud connection
- Check all the settings options
- Configure Message Import option according to you
- Select Archive Mailbox option settings from the available list, this allows you to directly import the PST to the Online Archive mailbox attached to primary mailbox
- Choose the items to be imported in NON mail item settings
- In Staging area Settings, you will be able to see the location of the PST file and size
- Import tolerance settings allow you to set the time to cancel the migration if too many items fail
- Now set the General settings and click OK
- Now, you will again be able to view the main screen
- Here choose Set mailbox option, a dialog box will show the available mailboxes to migrate the contents of the PST, select a mailbox
- On the main screen you will be able to view the PST file of selected mailbox
- Now, click ‘Import All now‘ option
- You can also stop this process by selecting ‘Stop Import’ option
- Now login to your Office 365 and launched Outlook (OWA) and you will be able to see the added PST on the screen with calendar entries in the Calendar view.
Note III : Make sure that your account should be a member of the Organization Administrator group.
Limitations :
Sometimes user faces errors while importing a PST to Office 365 due to its complex and lengthy steps. Therefore, getting errors in this process is very normal.
Alternative Way: ( Migrate towards Office 365 in 3 Steps )
In case you are looking for a fast and reliable tool that directly import your PST file into Office 365 without any hassle, then selecting third party migrating tool could be a wise decision.
There are multiple such tools available that offer migration of Outlook data files (PST ) to Office 365, but you must choose a tool which can offer migration of OLM file to PST as well as option to save PST file into Office 365 format.
Stellar Converter for OLM is powerful and reliable software that offers user-friendly environment to convert OLM data files to MS Outlook (PST) and Office 365.
This professional utility could be your best choice if you are planning to migrate your all mails into Office 365 without following lengthy steps along with complete email components, like emails, Contacts, Calendars, tasks, Notes etc.
For successful migration, Go through following steps —>
Step 1:
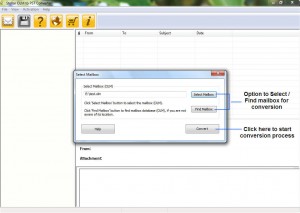
Select OLM File
Step 2:
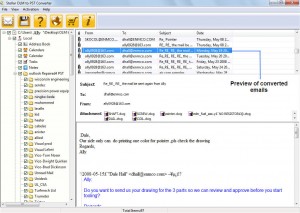
Check Preview of Emails
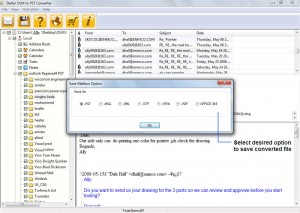
Save OLM File into Office 365 Format
Additionally, this tool offers you to save the converted file in PST, PDF, HTML and RTF Format as well.
Resource :
http://www.stellaroutlooktools.com/scan/olm-to-pst.php
